
Outzap - Advanced Features
Sending Messages Using Zoho CRM Workflow
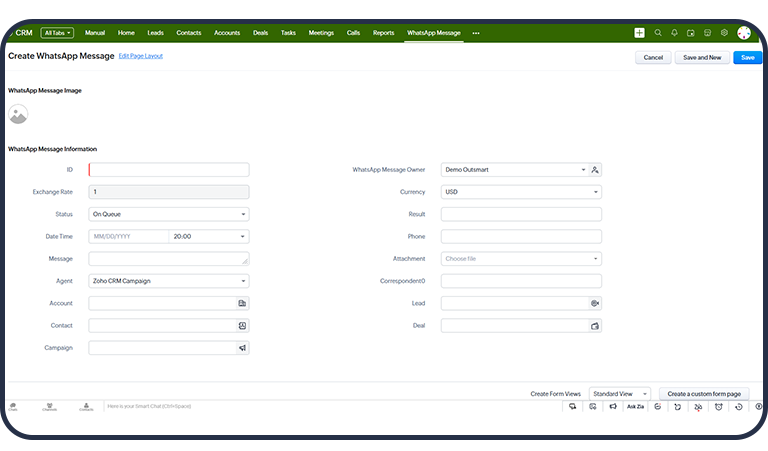
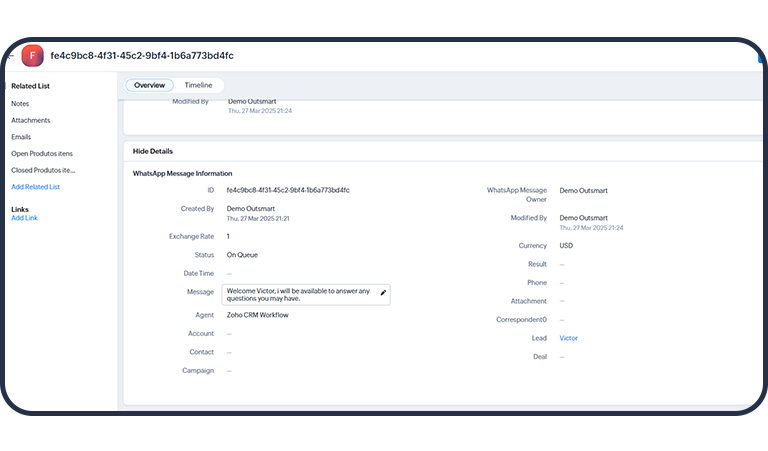
In the Outzap extension, we have the WhatsApp Message module, which includes the main fields for manual message sending.
Available Fields:
- ID: GUID generated to identify the message.
- Status: Message status.
- Message: Content of the message that will be sent to the recipient.
- Account, Contact, or Lead: Lookup fields to select the recipient of the message.
- WhatsApp Message Owner: Owner of the record from which the sender's phone number will be retrieved.
- Correspondent0: Phone number to be used for sending if no lookup fields are filled in.
- Phone: Sender's phone number, in case the user does not have one registered.
Automating Messages with Outzap Workflow
To automate message sending, Outzap offers a built-in workflow feature that triggers messages automatically upon creation.
Let's go through the step-by-step process to activate and configure this functionality.
Step 1: Activating the Workflow
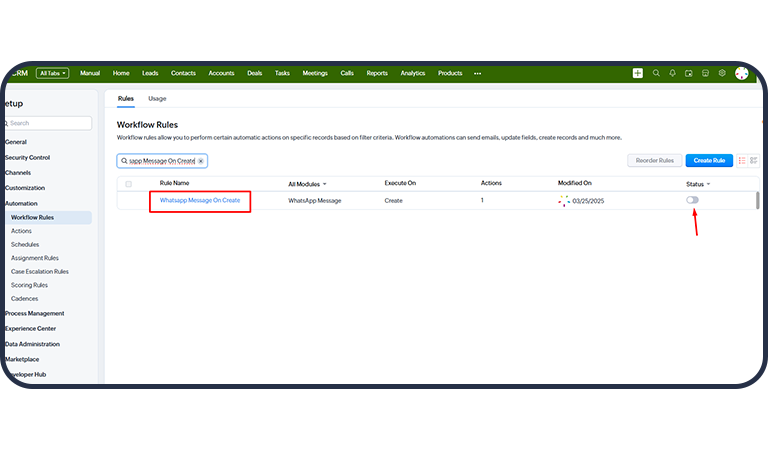
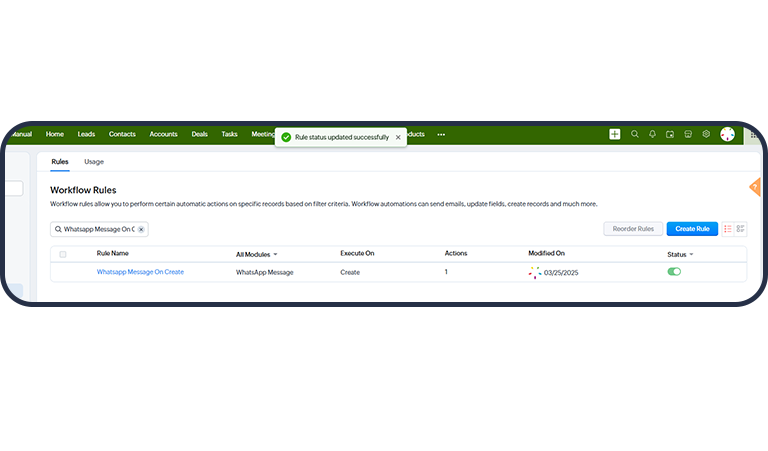
In the Workflows menu, search for "WhatsApp Message On Create", which is disabled by default. Then, activate this option.
Step 2: Creating the Automation
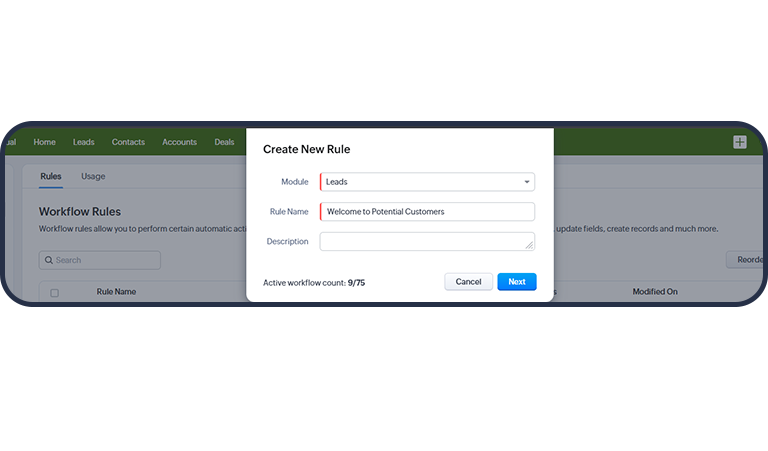
After activating the workflow, let's create our automation. Click on "Create New Rule", select the desired module, and give the rule a name.
Step 3: Configuring the Workflow Rules
In the example below, we'll use a workflow that sends a welcome message to all leads created in the Leads module. We will set it as a Function Action.
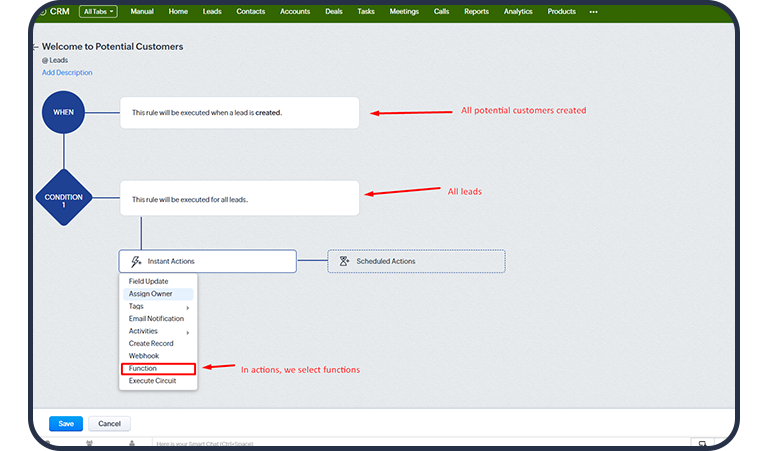
Step 4: Setting Up a New Function
Here, you'll define the new function that will be triggered by the workflow.
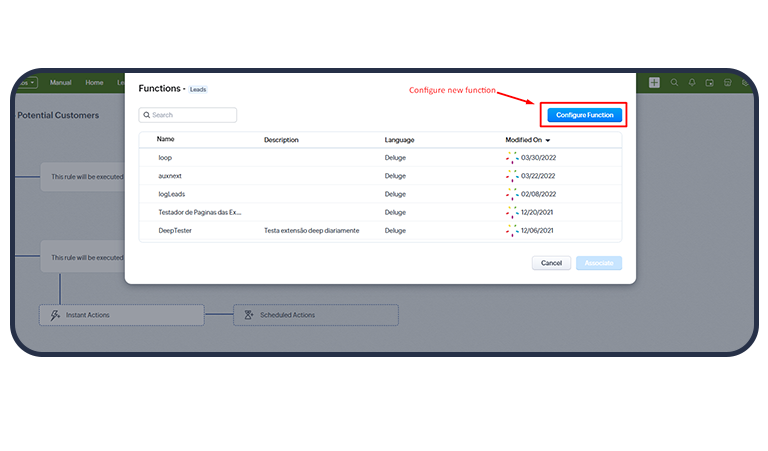
Step 5: Writing Your Custom Function
Write your own function
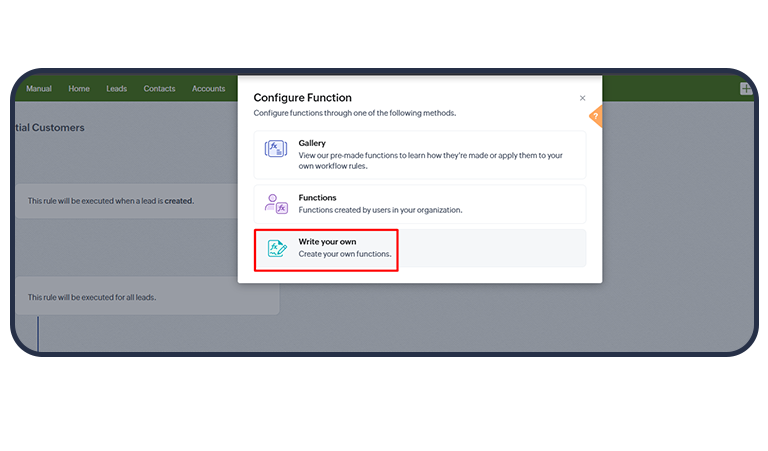
Step 5: Name the Function
We name the function as needed
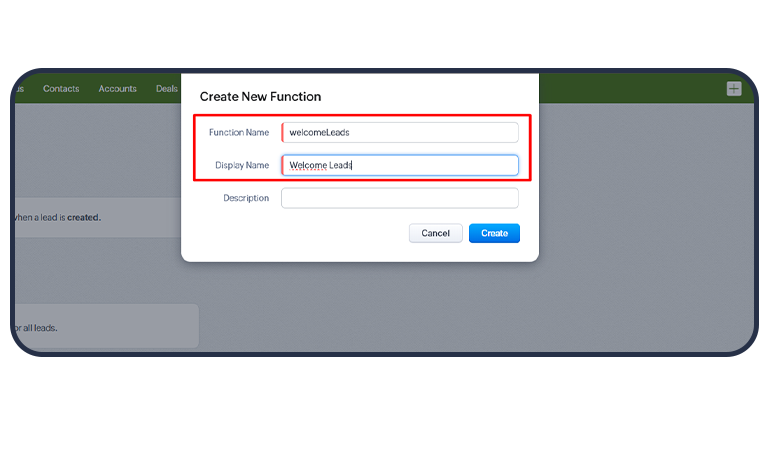
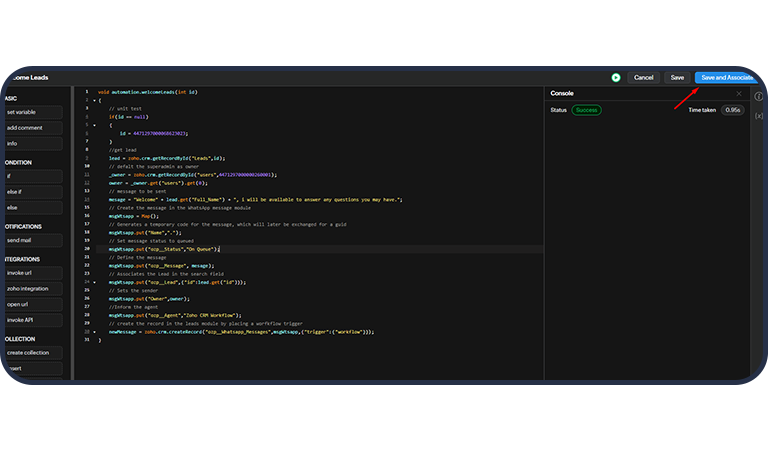
Step 6: Write the Code in Zoho Deluge
We write our code in Zoho Deluge (below we have a snippet as an example)
void automation.welcomeLeads(int id)
{
  // unit test
  if(id == null)
  {
    id = 4471297000068623023;
  }
  //get lead
  lead = zoho.crm.getRecordById("Leads",id);
  // defalt the superadmin as owner
  _owner = zoho.crm.getRecordById("users",4471297000000260001);
  owner = _owner.get("users").get(0);
  // message to be sent
  mesage = "Welcome" + lead.get("Full_Name") + ", i will be available to answer any questions you may have.";
  // Create the message in the WhatsApp message module
  msgWtsapp = Map();
  // Generates a temporary code for the message, which will later be exchanged for a guid
  msgWtsapp.put("Name",".");
  // Set message status to queued
  msgWtsapp.put("ozp__Status","On Queue");
  // Define the message
  msgWtsapp.put("ozp__Message", mesage);
  // Associates the Lead in the search field
  msgWtsapp.put("ozp__Lead",{"id":lead.get("id")});
  // Sets the sender
  msgWtsapp.put("Owner",owner);
  //Inform the agent
  msgWtsapp.put("ozp__Agent","Zoho CRM Workflow");
  // create the record in the leads module by placing a worfkflow trigger
  newMessage = zoho.crm.createRecord("ozp__Whatsapp_Messages",msgWtsapp,{"trigger":{"workflow"}});
}
Step 7: Save and Associate
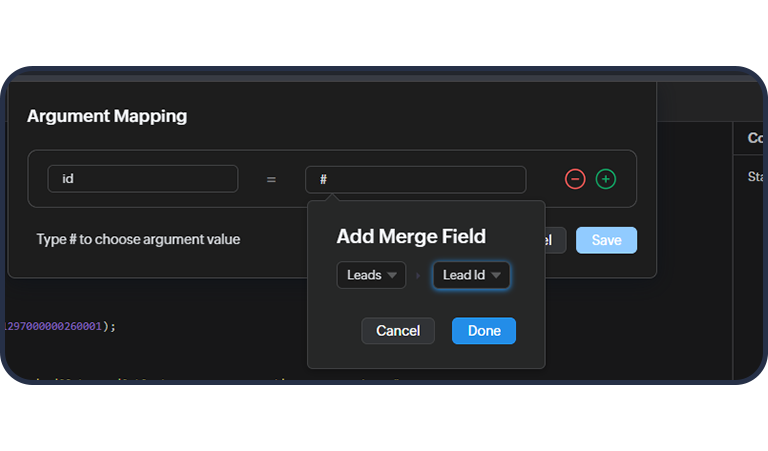
Step 8: Configure the Mapping Merge Field
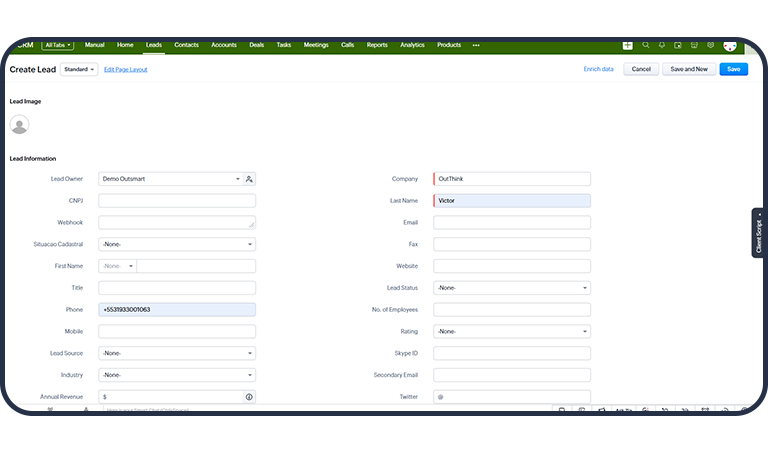
Step 9: Create a Test Record
Let's create a test record
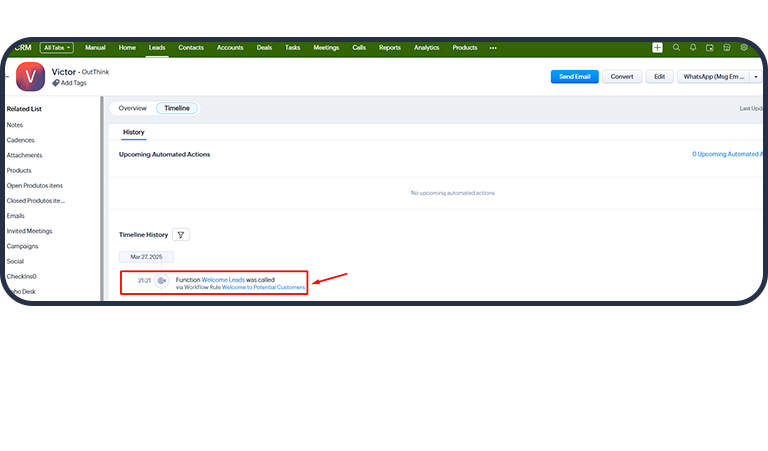
Step 10: Verify Workflow Execution
We can see that it ran our workflow in the record timeline.
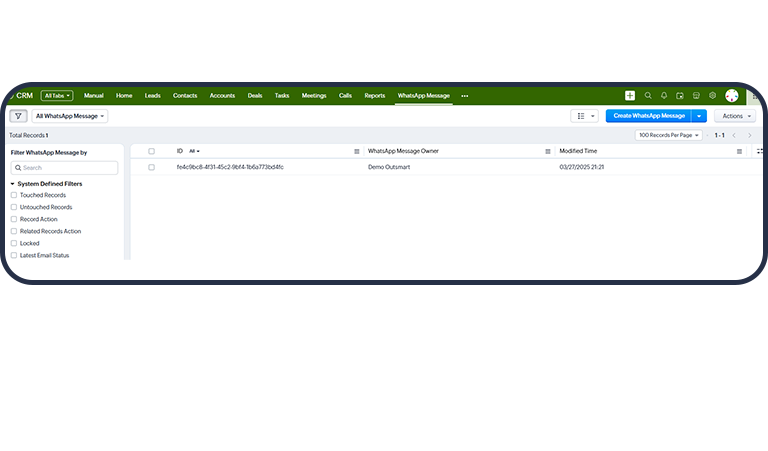
Step 11: Check WhatsApp Message Module
When accessing the WhatsApp Message module, we will find the record that was created
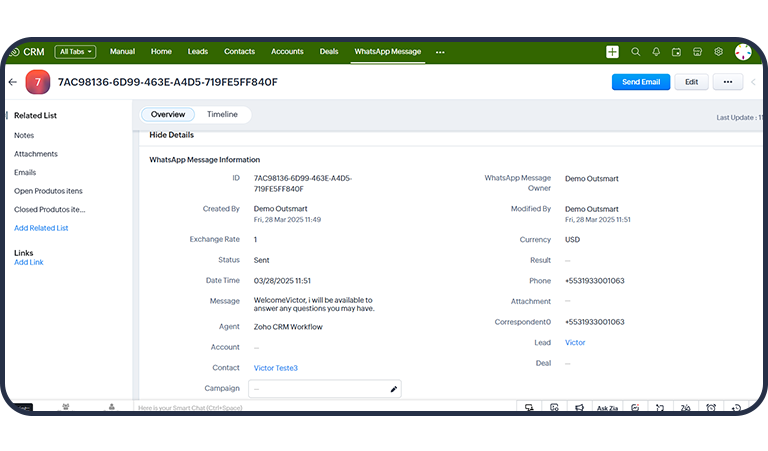
Step 12: Validate the Record Information
By accessing the registry we can validate the information that was generated
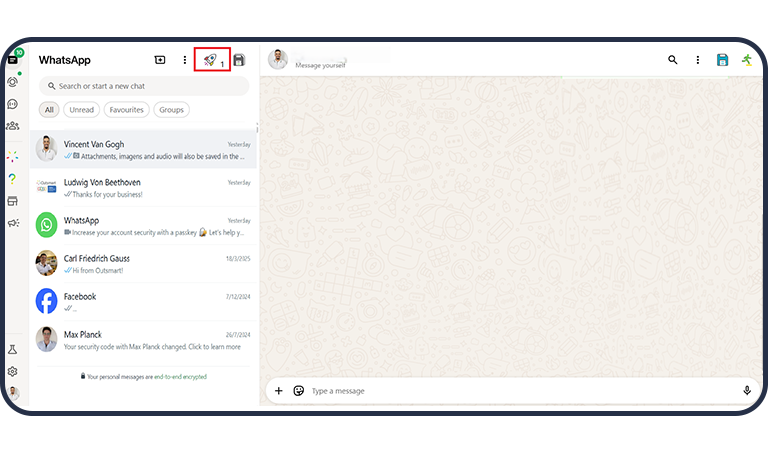
Step 13: Wait for Message to Load
With WhatsApp Web open and Outzap remote control enabled, we will wait for the message to load in the rocket.
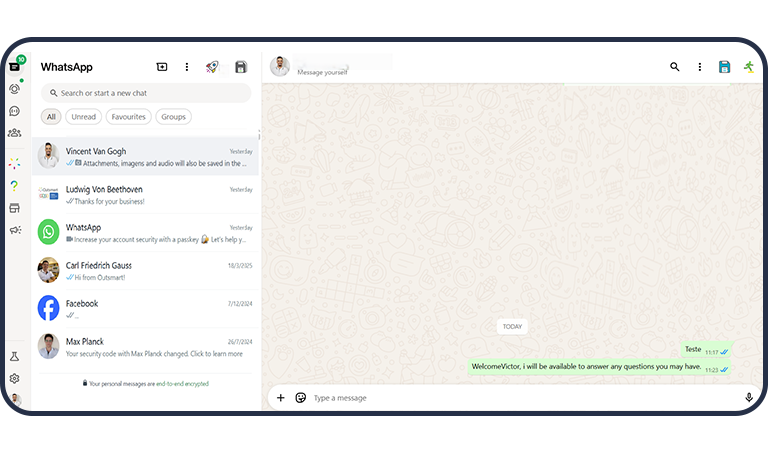
Step 14: Message Sent Automatically
The message will be sent automatically.
Step 15: Record Updated
The record in the WhatsApp Message module is updated.
Política de Privacidade e Termos de Serviço
Precisa de Ajuda?
Para dúvidas ou suporte, entre em contato:
Obrigado por escolher o Daily Backup para Zoho CRM. Proteja seus dados sem esforço!